Button Shield
Button Shield
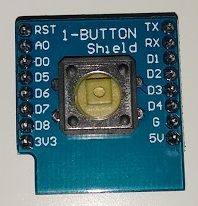
The Button Shield is a D1 Mini form factor shield, featuring a button. That’s it! The button is wired directly to the microcontroller, and can be used as a way of providing user input to our code.
Plugging in
Warning
While it is possible to plug shields in to the device while it is powered (plugged in to your computer), it is not recommended! As such, please remember to unplug the USB from your board prior to connecting or disconnecting any shields, or else you risk damaging the shield or the board.
In order to start working with the button, we’ll need to connect the shield to your TTGO board. If there is already a shield connected to your board, then first remove this. Then plug the button shield into the inner row of pins on the TTGO board, aligning the top edge of the shield (that says “1-BUTTON Shield”) with the antenna of the TTGO board. The shield should not hang over the USB port!
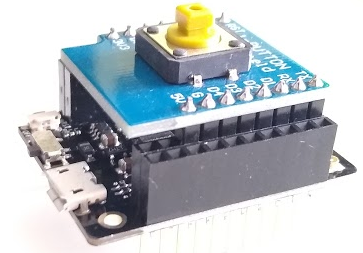
Note the two empty pin sockets in the headers closer to the USB!
Human Machine Interface
Now we’ve got the shield on the board, let’s run the following commands to test our button:
1 2 3 4 5 6 | from machine import Pin
import d1_mini
button = Pin(d1_mini.D3, Pin.IN, Pin.PULL_UP)
button.value()
# Hold the button down and then run that line again
button.value()
|
Now all LEDs on the LED Matrix should be illuminated! Now lets run through what we just did:
- Imported the
Pinmodule from themachinemodule – we need this to configure our pin to interface with the button - Imported our
d1_minimodule – we need this to get the pin information to then configure the correct pin to connect to the button - Created a
buttonobject that represents our button. This sets up our relevant pin as an input (Pin.IN), and enables a pull-up resistor on the pin (Pin.PULL_UP) - Checked what the current value of the button is - this result should be a 1 when the button is left alone, and a 0 when the button is pressed
We now have the ability to alter the result of our code by pressing a button! That is pretty exciting, as with this simple input capability we can now make gadgets that do things on command.
The only piece of magic we used to do this was the pull-up resistor. This is
used because one side of our button is connected to GND (0 volts), and the
other side of our button is connected to the microcontroller pin. When we press
the button, these two sides of the button are connected together, but otherwise
they are not connected. This means that we know that when the button is
pressed, the pin should return the value 0, as it is connected to GND. But
what about when the button is not pressed? By default, when the button isn’t
pressed it is “floating” - it is not connected to a voltage source from which
it could get a voltage. As such, we can not determine what it’s voltage might
be. By enabling the pull-up resistor, then the pin is connected to 3.3 volts
through a resistor. This means that when the button is not pressed, it is
connected to 3.3 volts, and so reads as a 1. It is connected to the voltage
through a resistor, meaning that it is a “weak” connection, which is then
overridden by our direct connection to 0 volts when we press the button.
SparkFun has a tutorial on this topic if this doesn’t make any sense, or
you would like to know more!
Make Something Happen
The most obvious use for a button, is to make something happen when you press the button! So lets do that:
while button.value():
    pass  # Ignore the button while it isn't pressed
print("The button has been pressed!")
Now we can make things happen on our device from the outside world!
Exercises
Time to take those concepts and put them into action! The following subsections detail different exercises that can improve our usage of the button.
Exercise 1: Make things happen again and again and again
Expand on the Make Something Happen code to make it so that the message is printed every time the button is pressed, not just the first time.
The message should only print once each time the button is pressed, no matter how long it is held.
Extension: Debounce the button. When a button is pressed or released, it opens and closes many times very quickly, which can cause undesirable behaviour (such as your code thinking it was pressed when you actually released it!). Expand your code to account for this bouncing, to correctly detect only real button presses.
Exercise 2: Bored Button
Hook the button up to the retrieval of an activity from the Bored API to make a button that the user can press when bored to get an idea of something they could do!
If the user has pressed the button too many times too quickly, re-list the
recent options provided and suggest they give one a shot, or wait a certain
period if they’ve earnestly considered them and decided they want a new option.
You will need a way of tracking time, such as time.ticks_ms().
Extension: Allow the user to hold the button down to override the wait time for the next activity if they hit the limit.